Goodwill Hunter is back again with some great looking DVD/Video Game shelves for his basement. Unlike his previous, floor-standing shelves, these were designed to hang from the rafters in his basement. Check it out!
My gameroom has once again reached “unholy mess” status. Unfortunately, I have run out of gameroom space, and am forced to confront the reality that all of this stuff won’t fit in a single room anymore.
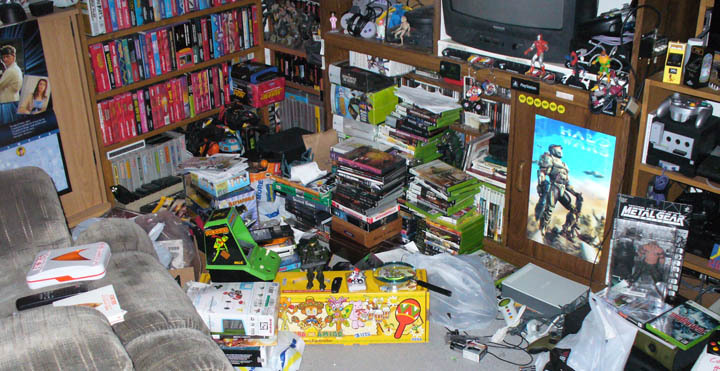
Some respond to such a crisis by cutting down their collection, but I responded by heading down to the basement. The hanging unit I put up a few years ago when I moved the DVDs out of my gameroom looked lonely, so I decided to build it two new friends and move some of my newer gen games to the basement.
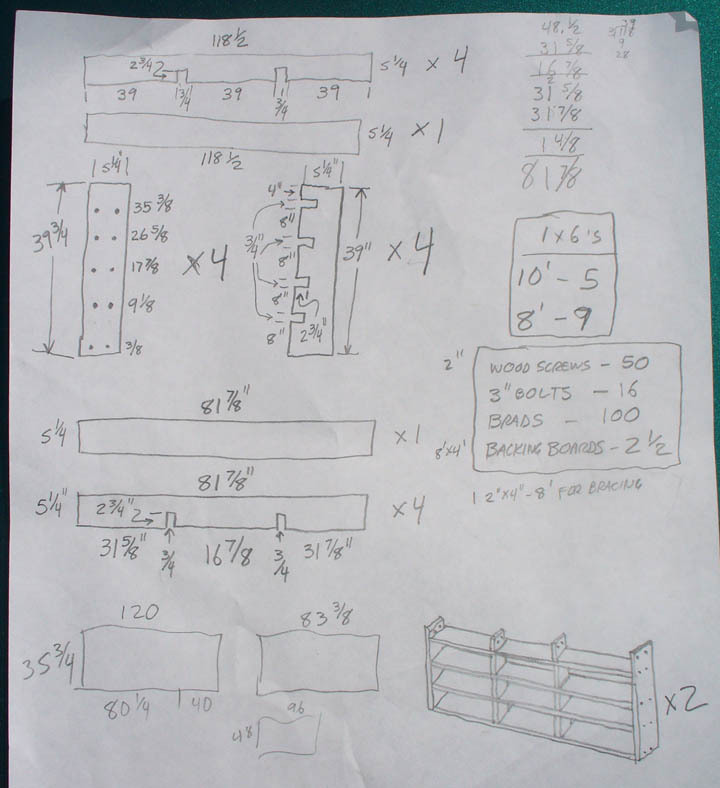
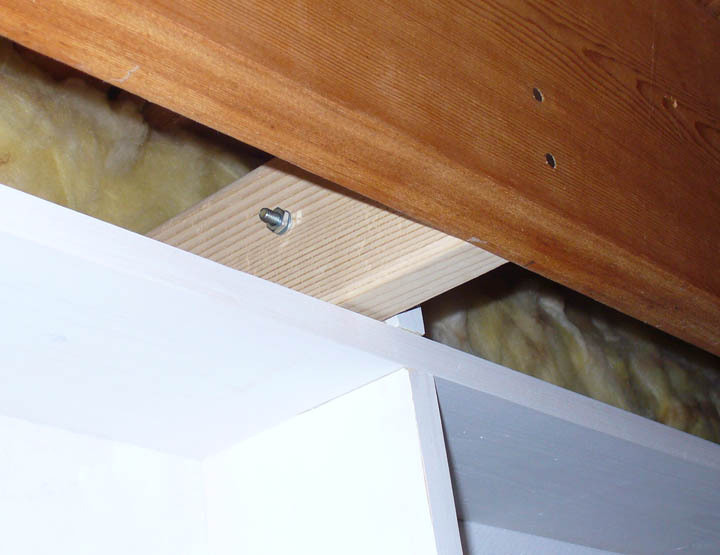
These shelves are cross-hatched, which requires precise cutting of slots in the shelves. You also have to leave tabs above the top shelf for bolting to the basement joists, and make sure your measurements space these tabs so they end up next to the joists…
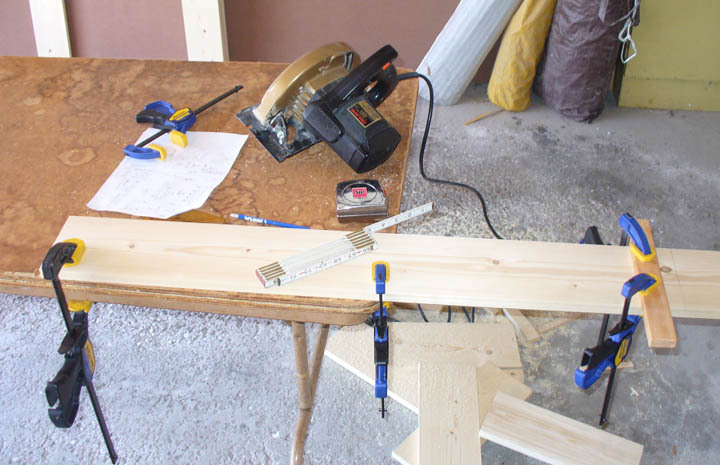
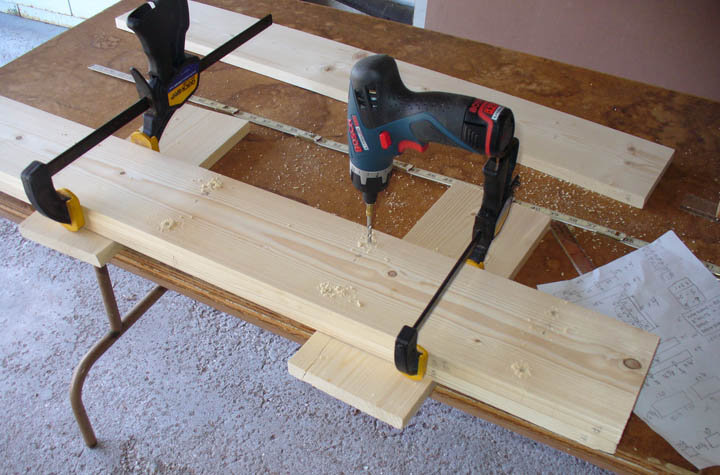
After double checking my measurements, I went to Home Depot and bought the necessary supplies. The wood was a bit more expensive than I anticipated, and the bill for materials was just over $130.00. I cut the wood in the garage as before, using a circular saw with the wood clamped to a table. After cutting the pieces to size, however, I took the shelves downstairs for some precision notch cutting on the table saw.
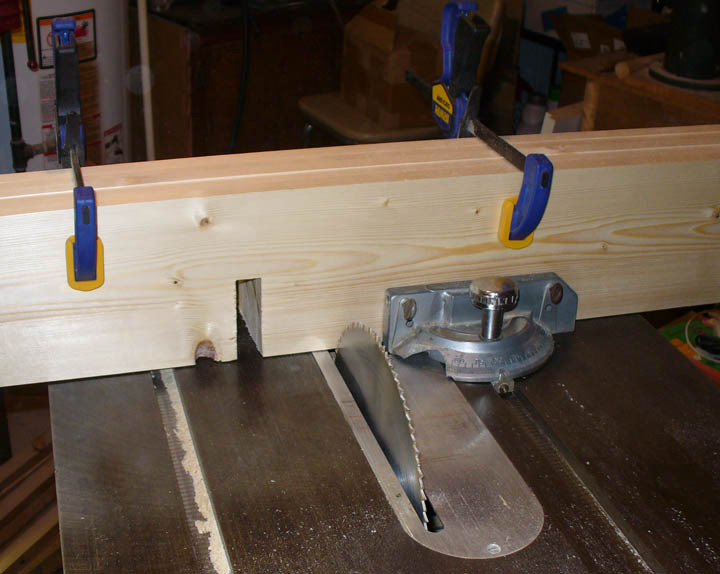
Carefully clamping the shelves together and cutting all notches at once helps to make sure they will fit together at the end. I then took everything back to the garage, and drilled all of the holes in the side boards and bottom shelves. Using a measured and drilled board as a template for the others is a big time-saver.
Once all of the boards were cut and drilled, I sanded all of the rough edges and painted all of the surfaces that would be visible with a quick-drying white primer. Once the boards were dry, I took them downstairs for assembly to avoid having to maneuver a finished unit down a narrow stairway.
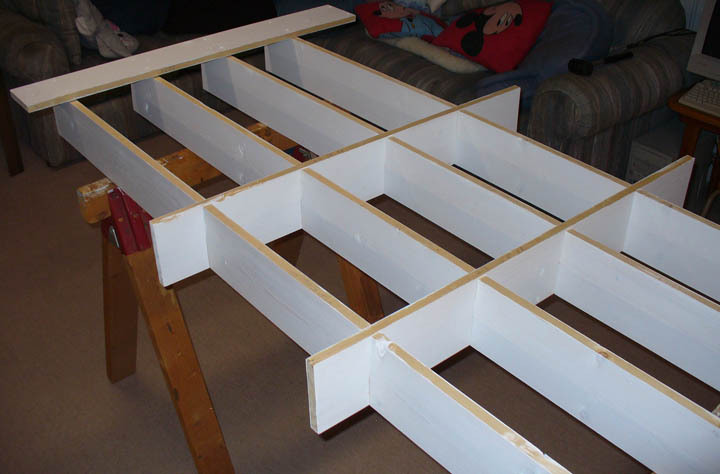
I fit the notched shelves and cross boards together on a pair of work horses, and then screwed on the side boards and bottom shelf. Once everything was attached and leveled, I put on the backing board.
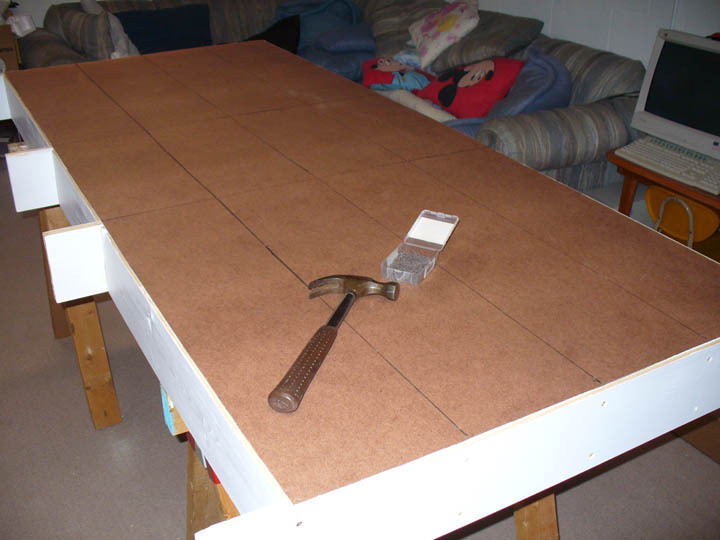
After centering it on the back of the unit, I nailed down one edge, and drew guidelines to ensure I didn’t miss a board when nailing on the backing board. Once the lines were drawn, I nailed down the board, moving from one side to the other to avoid making a “bubble” in the board.
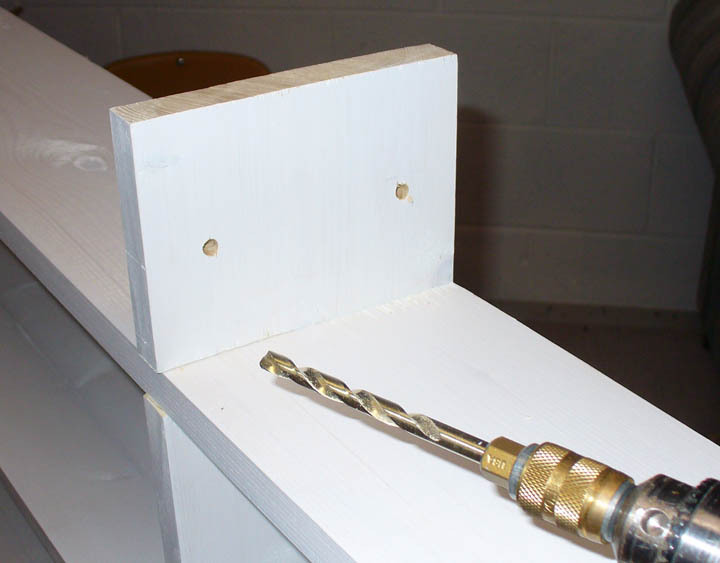
I repeated these steps for a second shelving unit. With the construction of both shelving units done, the final step is putting them up. I put 2 bolts in each tab, and drilled holes accordingly.
Got some help from my daughters lifting the units into place, and once there, drilled into the joists through the pre-drilled holes in each tab.
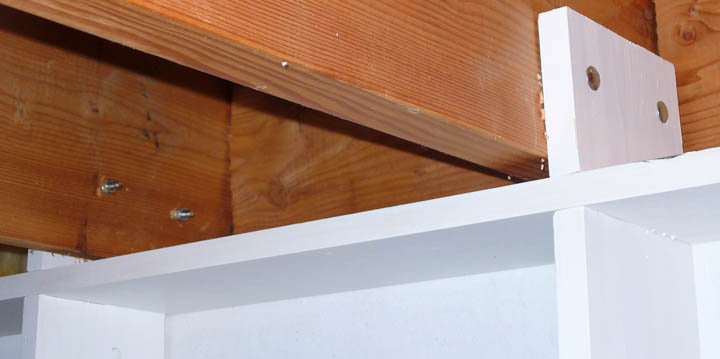
Ran bolts through each hole and tightened a lock washer and nut on each bolt. For the larger unit, I had to nail in 4 cross braces to attach the shelving unit to, as the joists on that side of the room run parallel to the wall.
Once all of the bolts are in place, the saw dust cleaned up, and the tools put away, you can enjoy a moment of satisfaction at a successfully completed job.
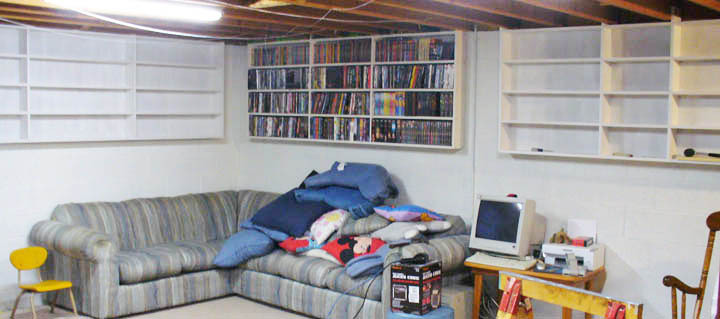
Now all that’s left is to fill them up and create some much-needed space in my gameroom!