Last weekend I started my first Raspberry Pi project. After reading that several people have turned their Raspberry Pies into emulation machines, I searched Google and found RetroPie, a pre-built image for the Raspberry Pi containing a ton of pre-loaded emulators.
At the start of the project I had three clear goals:
01. Power up the Raspberry Pi.
02. Install RetroPie
03. Play some games!
How did things turn out? Read on!
01. Power up the Raspberry Pi.
This project began with my Raspberry Pi still in the shipping packaging. Along with my Pi I ordered a red plastic case and a USB Wall Power Adapter. The red plastic case is large and goofy looking. The case is held together with four posts that insert into four holes. Upon opening it, I broke one of the posts. The Pi snaps into the case — no screws required. The USB Wall Power Adapter requires a micro USB cable that it did not come with and I did not have. My dad needed one too and ordered two cables. With power attached, the Raspberry Pi fired right up.

02. Install RetroPie
To install RetroPie, I needed an SD card. From what I have read on the web, Raspberry Pies are apparently somewhat finicky when it comes to hardware compatibility, but I used the SD card out of my digital camera and it seemed to work.
I searched Google and found the following website: http://supernintendopi.wordpress.com. That website contains an entire set of instructions that will get RetroPie up and running on your Pi.
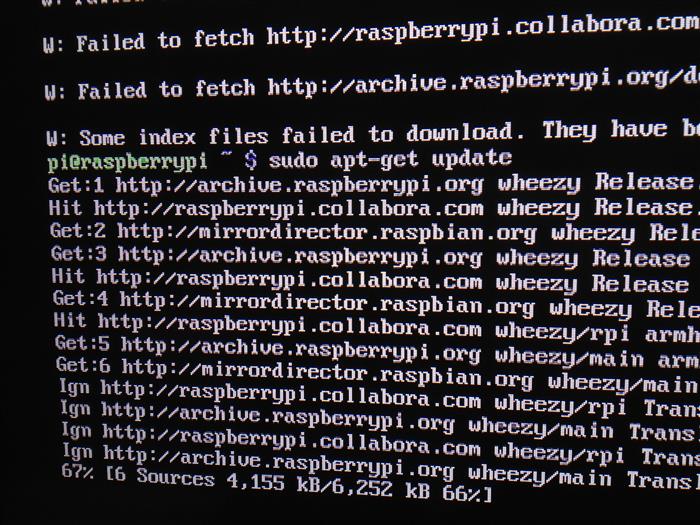
The first four or five commands took a minute or so to type in and process. The next command was the one that would download and update all the emulators and I was warned “would take about 9 hours to run.” With my 20 Mbit cable connection it took closer to 12 hours.
03. Play some games!
The final step was to reboot the Pi, go through the menu system, do some tweaking and play some games!

The initial elation I got from seeing this screen quickly faded after I was dumped out to a command prompt. While I didn’t get much time to troubleshoot before heading out of town this week, I think the SD card might have filled up. (I used a 4gb card when an 8gb card was recommended.) I’ll do some basic troubleshooting when I get home, but if it’s nothing obvious I may have to acquire an 8gb SD card and try again.
I guess the positive outcome here is that the Pi works. It fired up, got an IP address, and went nuts when I typed in update commands. That’s good. The takeaway is that I need more Linux knowledge to be able to do more troubleshooting on the Pi. Sounds like some more reading is in order.
If you think the SD card is full, the command “df -h” (without the quotes) will tell you the disk usage.
It looks like this is Debian based, so “apt-get clean” will clear out the package files it installed. That would be a quick way to free up disk space.
interesting project. keep us updated.
Questions abound:
1. I assume that the Pi, by default, boots to a command line?
2. Can the Retropie application be configured to auto launch upon powering on the Pi?
3. (longshot question, and assumes you have an Ultimarc) Does a USB Ultimarc arcade controller adapter work in conjunction with the MAME portion of Retropie?
In my perfect world, I could run a Pi with Ultimarc support inside my MAME cab on a proper sized LCD display, thereby significantly reducing the power demands of the cab (as well as dropping over 100 pounds of internal weight).
I think your doing it the painful way Rob. There is no need to compile RetroPie on your Pi if you are using a built image containing RetroPie. A pre built image means all the software has already been compiled for you. As all Pi’s use identical hardware there is no need waste 12 hours to compile your own edition of RetroPie. Just use a RetroPie (hard drive) image and copy it to your SD card using Win32 Disk Imager software.
“MAJOR TIME SAVING UPDATE:
To save a lot of time on the installation of RetroPie, you can actually just head over to the RetroPie Download Site, and grab the “RetroPie Project SD Card Image†– Then unzip that file to a location on your primary computer.”
Another precompiled Pi emulation project worth checking is PiMame by Shea Silverman that does Mame plus various computers & consoles including VICE.
http://blog.sheasilverman.com/pimame-raspberry-pi-os-download/
Rob,
You convinced me to get one. Pulled the trigger last night. Should be here next week. I did a little more research and it looks like I will be able to use my X Arcade Tankstick with it. I’m going to give it a try. I’m also going to give it a try with MESS to get a TI-99 set up working too. I hope there is a way to point the emulator(s) to either a USB hard drive or to my server to get all the needed files instead of loading up a SD card.
Keep up the great work, I enjoy everything you’ve been up to. Also great story about your Uncle, had me in tears.
Tex-Hogger