Because of the amount of noise my server puts out, it’s too loud to record podcasts in here. Instead I typically set up shop in what we refer to “the Star Wars room,” an upstairs guest bedroom that’s been overtaken by my Star Wars and toy collection. There are no electronics in the room (come to think of it, that may be the only room in the house that has no electronics in it!) so it’s nice and quiet in there. Unfortunately there’s no desk in that room, which makes it a hassle to set everything up in there. Each time I want to record I have to drag out a TV tray, set up my laptop and microphone on top of it, run cables, and do all kinds of wonky stuff. It also takes me a while to get everything set up because I never put things away and my pre-recording ritual involves a treasure hunt in which I have to walk around looking for a mouse and my headphones and a network cable and whatever else I might have misplaced since the last time I recorded.
It came to me that what I needed was a cart. A rolling cart on top of which I could place all of my podcasting gear. A Podcast Cart. A PODCART! Ideally what I was looking for was a plastic cart, the kind I remember seeing in our school library back when I was a kid. I scoured Craigslist for a few weeks looking for just the right cart, but everything I found was either too small, too large, or too expensive.
Susan had the idea of checking Harbor Freight (a local tool store) for carts. Not only did they have carts, but this week they had carts on sale! They had the plastic carts I was looking for, but a $100 price tag dissuaded me. I found what I was looking for in a $39 two-shelf metal cart, but if you know my luck with stores you already know that they were sold out of that model and they wouldn’t sell me the display; instead, I upgraded to the $49 (normally $59) three-shelf metal cart.
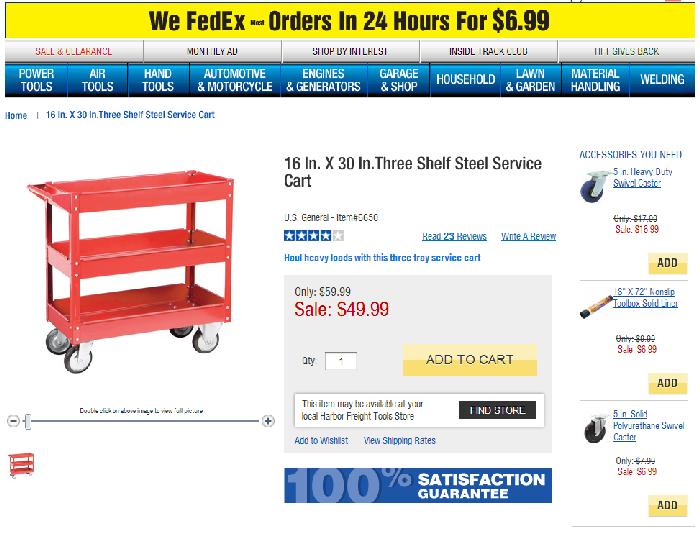
The biggest problem I was going to have with any cart was that everything sitting on top of it, including my laptop, would be sitting in a 3″ deep tub. After studying the display model in the store I realized that I could flip the top section upside-down when assembling it, giving the cart a flat surface on top for my equipment.
The cart came in a box that seemed too small to hold it no matter how many times I looked at it. Upon opening the box I found the following parts: three shelves, four side rails, a handle, four wheels, 16 nuts and bolts to attach the wheels to the cart, and 48 nuts and bolts to hold the cart together. Technically each nut and bolt also had two regular washers and one lock washer, for a total of 144 washers.
“Some Assembly Required. Approximate Assembly Time: 30 Minutes.”
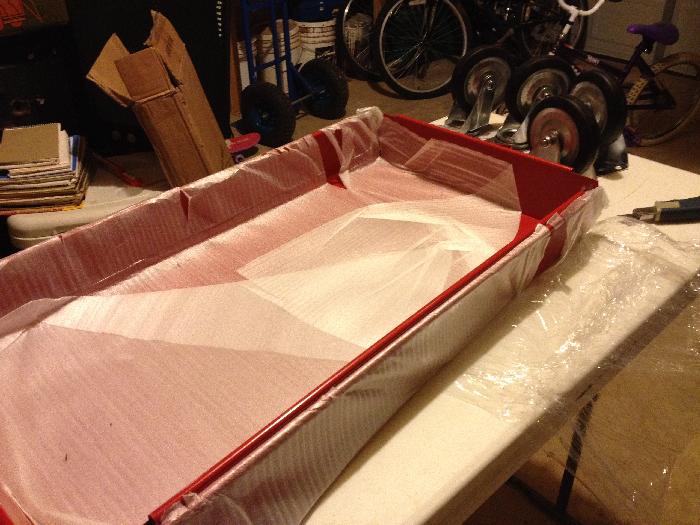
The following picture was taken Saturday night at 9:45 P.M., as I unboxed all the parts. Start the 30 minute timer!
Piece of cake!
The following picture was taken at 11:03 P.M.
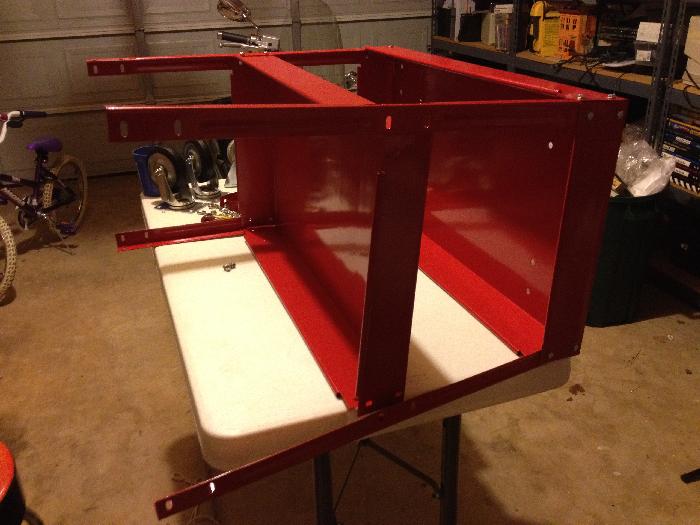
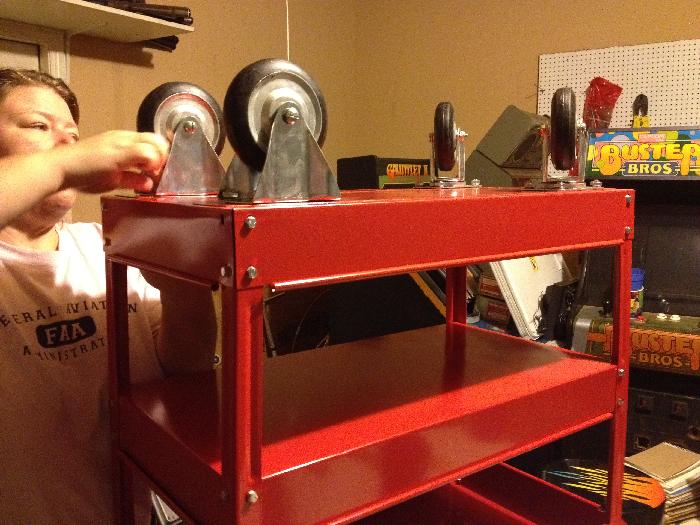
By this point in time, at least two sets of the bolts, washers and nuts had fallen to the ground and rolled “somewhere.” Because of the way the sides of the cart are shaped, each level requires more pressure to hold the metal pieces together while screwing the nut onto the end of the bolt. What I found worked best was holding the metal with both hands while holding the bolt in place with a third hand and screwing the nut on to the bolt with a fourth hand. Unfortunately I only have two hands, so most of this went terrible. At one point the side rail popped out of place shooting bolt whizzing past me, landing God knows where.
This photo was taken just after midnight. Two-and-a-half hours in, the cart was still not finished. I cannot repeat most of the words the cart had heard at this point. The cart is not as close to being finished as it looks in this photo. Also note the pliers, screwdriver, and plastic spring clamp on the table; none of those are listed in the instructions as required tools.
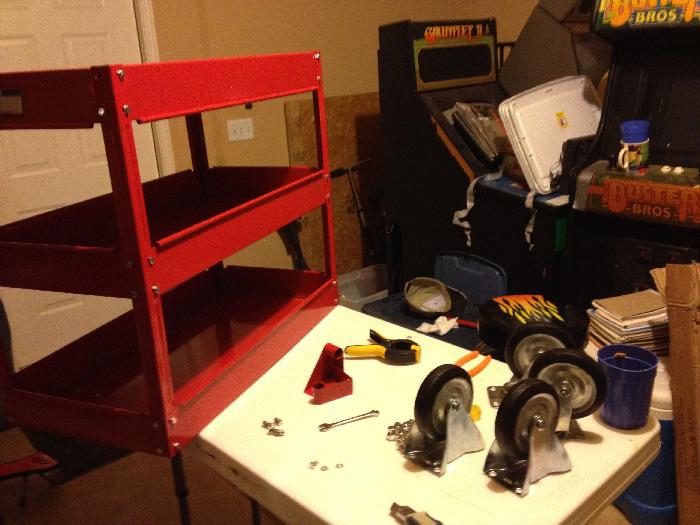
I figured out that the cart came with four extra sets of nuts and bolts, allowing consumers to assemble the cart either with or without the handle. Unfortunately by half-past-midnight I had lost five sets of them, meaning I was one short. While bent over looking for at least one of the five sets, my back gave out. It felt like someone had hit me right in the middle of my back with a red hot ax. When I tried to stand up, I couldn’t. Defeated, I hobbled back into the house and went to bed.
This picture was taken at 8 A.M., Sunday morning. Susan came to my rescue, arriving with a handful of Tylenol, a hot cup of coffee, and those other two hands I needed. With her help, we were able to finish assembling the cart in 30 additional minutes — which, according to the instructions, is how long the entire assembly should have taken. With Mason’s help I moved the cart upstairs into the Star Wars room.
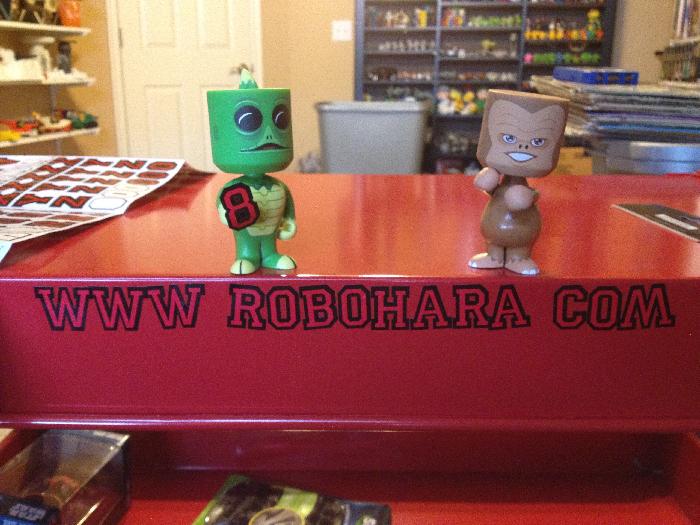
While out shopping last night, Susan and Morgan picked out these letter stickers for me. I knew there was no chance of me getting them all straight so I just stuck them on, intentionally making some of them crooked. I got some help from two Land of the Lost Bobbleheads. They didn’t mind. One side of the cart says “WWW ROBOHARA COM” (the page of stickers did not come with any periods) while the other side reads “PODCART”.
All that was left was setting up my gear. As you can see there’s plenty of room to store all my cords and gear below, and my idea of inverting the top shelf worked out great! My only complaint is that there’s a slight metallic echo I get when I talk too loudly — truth be told, I’ll probably cover the whole cart with a towel or something before recording.
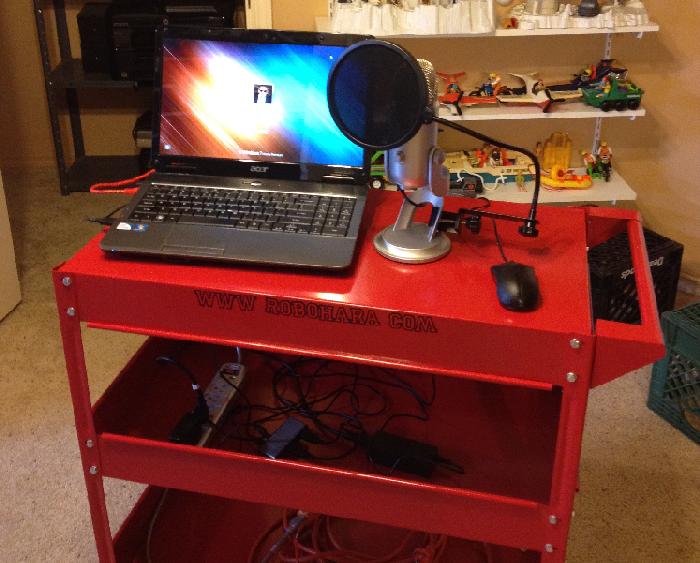
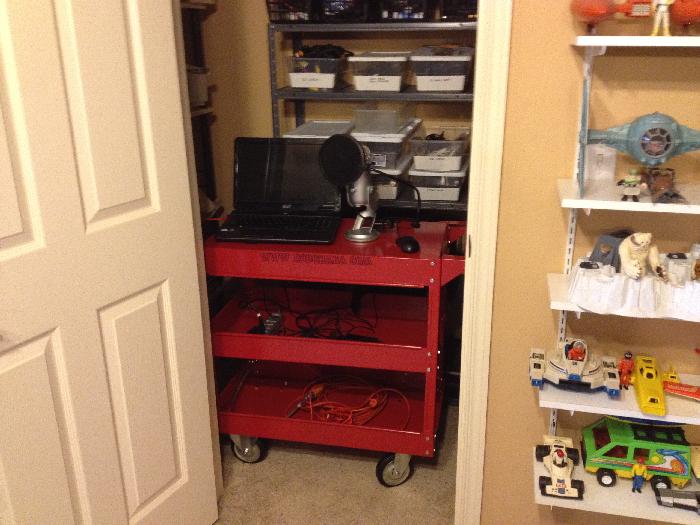
The best part is, exactly as I had hoped, the cart wheels in and fits into my closet, where it can be stored when I’m not recording. The solves my OTHER problem, AKA “The Cat Who Loves to Chew Cords.”
How about putting carpet in the middle and bottom shelves and a rubber mat on the top? That may cut down on the echoing….
no more excuses.. 1 podcast /week now. :)
My first thought also was “what is this big metal object going to do for echo”. But you already have that subject on your mind!
Towels will work great for anechoic effect. There could be a problem with lint at some point, though. See about a towel with a pillow case to reduce the lintiness.
The rubber pads made to stop rugs from slipping (looks like a grid) are great for the top. Stops laptop and gear from sliding around and cushions as well. Carpet tiles on the lower two shelves. That’s what we used in the audio class at work.
This is way too late to help you, but during assembly, what I would have tried to make up for only having two hands would have been to position the parts, then use spring clamps to hold them together while I put the bolts in. I probably also would have put all the nuts on loose, then when all the shelves were in position, gone back and tightened them up one at a time. Leaving a lot of slack in them might have made it easier to assemble the rest of the shelves.